Silent Hill Townfall Walkthrough
Updated 2026-10-13 · Category: Guide
This Silent Hill: Townfall walkthrough covers all six Parts and 17 chapters in story order, from the red fog in St. Amelia to the final boss and the epilogue. For each chapter you get the route through the area, where to go next, the key items to pick up and the exact puzzle answers, plus the clue or earlier step each answer needs first. That last part matters: some locks refuse a correct code until you have picked up its clue or finished the step before it. Optional collectibles are listed separately so they do not slow the route down.
The confirmed main story route
Townfall is divided into six Parts containing 17 chapters. PowerPyx's 100% guide numbers them 1 to 17. Its speedrun route lists 16, because chapter 17, Returning, is a short epilogue with nothing to solve.
You cannot go back to an earlier area once the story moves you on, so every optional pickup has to be collected in its own chapter or picked up on a later run.
The nine story trophies are not chapters. They unlock at fixed points along the route, so the last column is only a position marker.
Difficulty: the route, item locations and answers here come mainly from PowerPyx, whose 100% guides were played on Story Mode (its speedrun and endings guides do not name a difficulty). Its guides say the puzzle setting, Hinted or Normal, does not change the puzzles themselves; Hinted only highlights key text in clues. Combat tips and enemy counts below come from those Story Mode runs, so they may not work as well on Normal or Nightmare. The final boss method comes from the PowerPyx endings guide and AllThingsHow, neither of which names a difficulty.
Patch 1.4.0 (October 8, 2026) made The Weight's grab deal heavy damage instead of killing you on Story and Normal, made enemies less sensitive to noise, added a manual to the SWDP Remote Systems Control console and redrew the Aux Line puzzle. The route and codes below are unchanged.
| Part | Chapters | Main areas | Story trophies on the way |
|---|---|---|---|
| 1 · Arrival | 1 Cold Open · 2 Escape · 3 A Connection · 4 Searching for Zoe | Shorefront District – South; A Different Place | Welcome To St. Amelia (ch. 2); Resignation (end of ch. 4) |
| 2 · Zoe | 5 Zoe: Rounds · 6 Journey to Medical | Community Gardens; Shorefront District – North | A Long Night Ahead (end of ch. 5) |
| 3 · The Patient | 7 Zoe: The Patient · 8 Many Into One | St. Amelia Medical Center; Medical Center – Different | The Patient (end of ch. 7); Many Into One (end of ch. 8) |
| 4 · Clara Woods | 9 Begin Again · 10 Missing Parts · 11 Inside CEG HQ | Clara Woods Estate; CEG HQ ground floor | Key To The Castle (end of ch. 10) |
| 5 · Richard | 12 Richard: Getting Inside · 13 Richard: Another Attempt | CEG HQ exterior, floors 1–5 and the 10th floor | Find Yourself (ch. 13) |
| 6 · Simon | 14 Fix This · 15 Trying Again · 16 Eraser · 17 Returning | CEG HQ (Different); SWDP – Different; Clara Woods (Different); St. Amelia Shorefront | Can't Change Things (end of ch. 15); Eraser (ch. 16) |
Why a correct answer can still fail
Townfall often does not let you skip puzzle steps. PowerPyx, who routed the full campaign for a speedrun, says the game generally will not let you complete a puzzle, even with the right solution, until you have picked up the clues that belong to it.
So a lock can refuse a code that is correct. Sometimes the digits are right but you have not yet picked up the document, card or CRTV broadcast they come from. Sometimes an earlier interaction, such as checking a meter or reading an email, has not happened yet. Not every lock works this way, but when one refuses a known answer, this is the first thing to check.
The organ transport box in Zoe's house shows how long that chain can get. Its digits are on a transplant card upstairs, but the email that tells you which digits to use only appears once the power is back on. Restoring power needs a card from the newsagent, and the power guide sits in a dark crawlspace, so you also need the flashlight and its batteries. GamesRadar+ found the same thing on New Game Plus: knowing 956 / 133 in advance did not let it skip these steps.
When a correct entry does nothing, do not keep retrying it. Check the code quick reference further down this page, pick up or do what is listed for that lock, and enter the same answer again.
Part 1: Arrival — Chapters 1 to 4
You play as Simon. Part 1 covers the south half of the Shorefront district and one short Otherworld hotel. The item chain runs from a phone booth to a lanyard, then to a scalpel, and ends at the scales in Zoe's clinic office.
Chapter 1 — Cold Open: the town square and the first phone
Where you are: the pier into St. Amelia. Goal: reach the town square and use the first phone.
Every phone number to call for the Cold Calling trophy
- Walk through the red fog until you reach the town square. The Shorefront map (Shorefront District – South) is added automatically. Numbers in brackets on this page, such as Town Square (5), are the numbered markers on that map.
- At the first phone booth in Town Square (5), read the "Your Local Services" flyer to the right of the phone. It lists 900 (Emergency Services), 010 (Operator) and 100 (Save Yourself).
- Call all three. Dialling 100 saves your game from any phone for the rest of the run.
- Boat Tour Cancelled Notice: on the door of the small building to the right, after the tarp blows off the St. Amelia sign on the pier.
- Shorefront Family Clinic Notice: on the wall beside the Clinic (6) door, northeast of the square.
- Phone number 496 0496 (Tourist Center): printed on the bottom of the map. Call it from any phone.
NEXT →Using the phone pulls you into the Otherworld, an area the game calls A Different Place.
Chapter 2 — Escape: the door wheel in A Different Place
Where you are: a hotel room with two locked doors. Goal: open the door with the wheel, then the door to the hotel room.
- The CRTV is added automatically as you pass through this area. Tuning it reveals enemies through walls and fog and picks up the broadcasts that puzzles depend on.
- Take the Room Service Card from the table. It gives the year, 1996.
- Tune the CRTV to the broadcast that shows the day and month. PowerPyx lists it as Channel 60. GamesRadar+ describes it as the images that flash up once you have learned to tune a signal.
- Spin the wheels on the door to 18 on the top, January in the middle and 1996 on the bottom. If the right date does nothing, check that you have read the card and seen the broadcast.
- In the bathroom behind it, take the Room 204 Key from the counter and use it on the door to the hotel room. Keep the key: its next use is the last door of Chapter 8.
- Take the elevator down to the real hotel reception. Welcome To St. Amelia unlocks as you return to the town.
- Two CRTV signals in the hotel room, one just under 50 and one just over 62. Store each one when the tracking dot sits inside the box. Both count towards Sweeping Signals.
- Hotel Room Note: on the bathroom counter next to the key.
- Hotel Reception Notice: behind the reception desk, to the right as you step out of the elevator. The number at its bottom, 496 0244 (The Haldane Hotel), can be called from the payphone outside.
NEXT →Back in the real town, head to Zoe's house, west of Town Square (5).
Chapter 3 — A Connection: restoring power at Zoe's house
Where you are: Shorefront District – South. Goal: get the power back on in Zoe's house and open the organ transport box. Each step needs the one before it, so do them in this order.
Zoe's house power card: the full step-by-step guide
Organ box code and ET code: how 956 and 133 are worked out
- Ground floor: take the Flashlight (No Batteries) from the drawer to the left of the organ transport box in the kitchen.
- Upstairs, find the AA Batteries in the drawer of a small cabinet in a room on the left. PowerPyx says the second room on the left, but GamesRadar+ says the first room on the left at the top of the stairs, so check both. Combine the batteries with the flashlight in your inventory.
- Upstairs, through the room on the right, pick up the Organ Transplant Card from the bathroom floor. GamesRadar+ calls it the Human Transplant Card. The number on its right-hand ET-No line holds the box code.
- Back downstairs, crouch into the crawlspace beside the stairs. Use the flashlight to find the Power Card Credit Guide by the meter. You cannot use the panel yet. Checking the meter adds Peters Newsagent to your map.
- Go to Peters Newsagent (2). According to GamesRadar+, your first enemy is here and the way in is the open back door. Fight it or slip past it, then take the Prepaid Power Card from the cash register.
- Return to the crawlspace panel. Insert the card in the slot at the bottom of the display, press button A until the screen reads "Card Credit", press button B, then flip the main switch at the bottom right.
- With the power on, switch on the computer, refresh the inbox and read the middle email, "For Attending…". According to GamesRadar+, it tells you the code is the first three and the last three digits of that ET-No number.
- In the kitchen, open the organ transport box: 956 on the left, 133 on the right. Zoe's Lanyard is added automatically.
- A CRTV signal at about 45, available as soon as the chapter starts.
- Vigil and Protest Flyer: on a bench on the west side of the pillar in Town Square (5).
- Strange Postcard 1: on the counter of VIDEO STAR (1), at the end of the road west of the square.
- Hand Delivered Letter on the living-room table in Zoe's house, and the Newsagents Note on the Peters Newsagent counter.
- The top and bottom emails on Zoe's computer, "Your Letter" and "Please Report In".
NEXT →Take the lanyard to the Clinic (6), northeast of the square.
Chapter 4 — Searching for Zoe: Clinic, Pharmacy and Jess's house
Where you are: Shorefront District – South, holding Zoe's Lanyard. Goal: bring three items to the scales in Zoe's office. The Scalpel you pick up first opens every rusty door with a hatch in the middle, so learn to recognise those doors.
Pharmacy locker code 6539: the clues and what you need first
Strange Postcards: what the Blur Your Eyes trophy needs
Clinic scales: which item goes where, plus the reception code
- Clinic (6): use Zoe's Lanyard on the pad to the left of the door. The lanyard stays in your inventory, and you need it again at the end of this chapter.
- Inside, go through the second door at the end of the hallway (marked Z Ellis). Take the Scalpel from the green box on the table beside the computer.
- Pharmacy (7): choose the Scalpel at the door. In the back room, use the radio on the table to pick up its broadcast (Channel 30). Hold the tilt with the right stick until the colours stop moving, then fit the colours into the boxes with the D-pad.
- Open the rusty locker in the back room with 6539 and take the Prescription Dosage Error. The digits are on the posters inside the Pharmacy, and the broadcast gives their order, so you need to have seen both.
- St. Amelia Park (11): use the Scalpel on the door on the south side of the park.
- Go into the apartment building south of building (14), up to the second floor and into apartment 1/2. Take the 21 Farrow St. – Back Door Key from the living room table.
- Jess's house, beside (14): use that key on the back-door lock, then take the Broken Stethoscope from the bed in the bedroom.
- Return to the Clinic (6) and go to the back room by the Z Ellis door. At the scales, place the Broken Stethoscope on the left, the Prescription Dosage Error in the middle and Zoe's Lanyard on the right. Part 1 ends here, with the Resignation trophy.
- Clinic reception: the keypad door on the left near the entrance opens with 2896, from the post-it note on the Z Ellis computer. The answering machine inside marks the Pharmacy on your map, and the Nurse's Rounds Form is on the counter. The speedrun route skips this room.
- Resignation Letter to the left of the scales, the two emails on the Z Ellis computer, and the Note on Patient Records in Dr Stevenson's desk drawer (first door on the right).
- A CRTV signal at about 17 as you approach Town Square.
- Strange Postcards 2 to 4: beside a dumpster in the alley behind building (3), reached through the park's south entrance and a left turn; on the wall at the west end of Farrow Street; and at the end of the bed in the southeast room of apartment 1/2.
- In Jess's house: Jess's Door Note on the back door, Task Assignment and a Lockbox Key in the kitchen, and Jess Legal Advice in the living room. The key opens the blue lockbox in apartment 0/1 of the building south of (14).
NEXT →Part 2 starts in Zoe's house, and this time you play as Zoe.
Part 2: Zoe — Chapters 5 and 6
Chapter 5 is played as Zoe, who carries a pager instead of the CRTV. It tracks nearby enemies in a similar way. Chapter 6 switches back to Simon.
Chapter 5 — Zoe: Rounds: the gardens and the Medical Centre gates
Where you are: Zoe's house. Goal: cross the Community Gardens and Shorefront District – North, then open the gates at the Medical Centre.
Mr. Stewart's house: the radio trick and the key
The Medical Centre phone puzzle, step by step
- Community Gardens: find the flower bed with Jane Chalmers' name on it and read the year. Enter 1993 on the shed lock.
- Take the Community Garden Key from the shelf on the right inside the shed and use it on the garden gate.
- Mr. Stewart's House, Shorefront District – North: after you see the monster for the first time, switch on the kitchen radio to draw it away, then go into the bathroom and take Mr. Stewart's Key from above the tub. Use it on the back door you came in through, via the bedroom.
- Outside the Medical Centre, read the Medical Security Note on the window of the security booth. It gives the number 496 0556 (D. Glenn).
- Walk back down the street to the phone booth and dial 496 0556. When prompted, press 3, then 2, then 2 again, then 1.
- In the back parking lot of the Medical Centre, go through the garage door into the office and press the button beside the phone. The gates beside the building open, and the chapter ends with A Long Night Ahead.
- Save It For The Patients: use no healing items while playing as Zoe in Chapters 5 and 7.
- Water Warning on Zoe's living-room table (its number, 0163 296 0595, can be called from her phone), plus the single email on her computer.
- Jane Chalmer's Obituary on the shed's middle shelf.
- St. Amelia Standard on Mr. Stewart's living-room table, and the number 496 0103 (Zoe Ellis) in the folder beside his answering machine.
- Community Help Needed and Exhausted Supplies in the Medical Centre parking lot: on the first table on the right, and on a bed in the tent at the back left.
- From here on, radios can be switched on to distract enemies, and thrown bottles, bricks and car alarms work as lures.
NEXT →Chapter 6 switches back to Simon, starting as he leaves the Clinic.
Chapter 6 — Journey to Medical: the pistol and Flemington Street
Where you are: outside the Clinic, as Simon. Goal: take the pistol, then get north to the Medical Centre.
- In Town Square (5), interact with the box and choose "Yes" to take the Pistol. This is required: accepting it shifts the town into the Otherworld and lets the story continue.
- Head north. On Flemington Street, choose the Scalpel at the rusty door.
- Continue on to the Medical Centre. PowerPyx's speedrun route lists no other lock or puzzle before Part 3 begins.
- A CRTV signal at about 63 as soon as you leave the Clinic.
- Pull! trophy: pick up the bottle just past the Pharmacy, go back to the Pharmacy and save, then throw the bottle straight up in the road and shoot it.
- Strange Postcard 5: down a stairwell beside some boots, in the alley west of the phone booth in The Wynds (15).
- Apartment building south of the Medical Centre: Scaffold Notice and a Handwritten Note; a radio broadcast at about 25; apartment 2/2 behind a Scalpel door, where you can print Photo1 and Photo2 after switching on the kitchen printer. A Lockbox Key on the bed in apartment 1/1 opens the container on the fourth-floor landing, and Strange Postcard 6 is in the last shed on the left out of the back door.
NEXT →Part 3 opens in the surgery of the St. Amelia Medical Center, with Zoe.
Part 3: The Patient — Chapters 7 and 8
Chapter 7 is a run of medical procedures as Zoe. The answer to each one comes from the laptop to the left of the bed. Chapter 8 returns to Simon in an Otherworld version of the same hospital.
Chapter 7 — Zoe: The Patient: keeping the patient alive
Where you are: Surgery, St. Amelia Medical Center. Goal: complete every procedure Dr. Glenn asks for over the intercom. Take the St. Amelia Medical Center map from the wall on your left at the start.
X-ray room code 7103 and every surgery answer on one page
- Readings: answer the intercom with values from the monitors. Middle monitor on the right, seen from the foot of the bed: Systolic 70, Diastolic 40. Bottom monitor on the right: Pulse 160. Upper monitor on the left: SpO2 80%. The numbers drift a little, so choose the closest option. A wrong answer costs health.
- Leave by the door on the right of the room with 7103, the number sent to your pager.
- X-Ray, skull: turn on the computer, zoom in and move the camera up until "Patient Skull – Aligned" is at the top of the screen. On the panel to the left set POWER on, SITE Skull, kV 3, mA 7 and Time 1, then press the green button at the bottom right.
- X-Ray, chest: move the camera down until "Patient Chest – Aligned" is at the top. Set SITE Chest, kV 7, mA 3 and Time 1.2, then press the green button. The values come from the X-Ray Dosage Table on the laptop.
- Take the Head and Chest X-Rays from the printer right of the computer. Put them on the board left of the intercom, then select the head and the chest when prompted.
- Tensobromide: at the end of the Victoria Ward ground-floor hallway, in the green medical box in the Pharmacy Store.
- Chapman Ward, first floor: the second email on the desk computer ("Dailies – Infusion Status") marks the infusions on your map. Read "Dailies – Records Room Code" on the board left of the computer in the top-left office, then take Dextracyclate from the infusion machine in Bay 6.
- Records Room, top-left corner of the Chapman Ward ground floor: enter 2605, then take Hydroxalene from the green medical box in the cabinet.
- Back in Surgery, set each pump from the Medication Dosage Table on the laptop. Use the third column, which matches the 88 kg weight on the whiteboard. For each pump press SET RATE, enter the rate, press the check mark, then READY PUMP: Dextracyclate 15, Hydroxalene 7, Tensobromide 8. Start them from the small console left of the bed.
- Dr. Glenn gives you extension 5353 (Hospital Storage). Dial it on the phone in reception, then take the Medical Intubation Kit from a shelf in the Victoria Ward basement storage room, through the gap in the lockers.
- Intubate: find the points where the view flashes red and hold R2/RT at each one, in this order: right side, lower left, top. The chapter ends with The Patient.
- The two supply emails on the Consult Room B computer, the "Unrealistic Expectations" email on the Chapman Ward first-floor computer, and the Equipment Cleanup Notice on a bed in the basement hallway.
NEXT →Chapter 8 continues as Simon in Medical Center – Different.
Chapter 8 — Many Into One: blood bags and the transfusion
Where you are: Medical Center – Different. Goal: collect five named blood bags, feed the two transfusion machines, set the blood-type rings and leave through the Room 204 door. Zoe's Patient List marks every blood bag on your map, so pick it up early.
Blood bag puzzle: every bag, the wall slots and the blood-type rings
- Open the Surgery door with 7103 again, squeeze through the crack and crouch through the vent.
- Upper-floor hallway: take the Medical Center – Different map from the counter by the metal door.
- Go down the right hallway, through the bottom door at the end and crouch through the vent. Take the Alan Duncan Blood Bag from the left of the bed and Zoe's Patient List from the table beside the tape player.
- At the end of the left hallway (S.W. above the door), place the Alan Duncan Blood Bag in the transfusion machine and use the transfusion switch.
- Ward S: follow the path round the left of the map to room 05, bottom left, and take the Sarah Watson Blood Bag from beside the bed.
- Ward W: take the Ward W Master Key from the table in room 04 on the bottom floor. Unlock room 13, climb its ladder to room 12 above and take the Lesley Greer Blood Bag.
- At the end of the right hallway (D.P. above the door), place the Lesley Greer Blood Bag in that transfusion machine and use the switch.
- Ward D: go to room 03, then through the hallway to room 02, and press the elevator button to drop the Matthew Clark Blood Bag to the floor below.
- Ward P: back upstairs, crawl through the vent on the north wall of room 06, cross the room and drop to the lower area. The George McEwan Blood Bag is in room 10 on the lower floor, and the Ward P Master Key comes with it. Unlock room 03 and take the Matthew Clark Blood Bag from between the elevator doors.
- To get out of Ward D, turn the valves in rooms 05 and 10 on the upper floor. A large enemy patrols here: turn each valve only when it is on the far side of the room, and hide in the nearby closets if it heads for you.
- Central room: place Sarah Watson in the first slot on the left, Matthew Clark in the second slot on the left and George McEwan on the right, then use the switch left of the double doors at the back.
- Blood-type rings: check Simon's blood type on the Medical Wristband under Equipment; Ordell is Simon's surname. Only O−, O+, A− and A+ may reach the centre, which means T.F., H.M. and S.W. Turn the rings until straight lines connect those three initials to the centre, then press the ORDELL button.
- Use the Room 204 Key on the door at the end of the hallway. The next part starts right after the cutscene, and Many Into One unlocks.
- Strange Postcards 7 to 9: on the back counter of the X-Ray room; on the table in Ward W room 06 (opened with the Ward W key); inside the wall cabinet in Ward P room 08.
- The Pipe, a melee weapon, at the blocked door just after the vent, and a radio broadcast at about 28 past the crack.
- A Lockbox Key in the key cabinet of Ward W room 11, for the resource container on the floor of Ward S room 01.
NEXT →Part 4 begins on a harbour pier outside Clara Woods.
Part 4: Clara Woods — Chapters 9 to 11
Clara Woods is the longest item hunt in the game, and it all feeds one barcode scanner. It is in the CEG Employee Lockers building on the ground level. Each barcode you find prints a locker PIN, and three of those lockers hold the parts of the device that opens the Strange Gate to CEG HQ.
| Barcode | Where you get it | Locker PIN | Inside the locker |
|---|---|---|---|
| CEG Lockers – Locker 75 | Counter opposite the lockers computer | 184 | Flare Gun |
| South Brae – Locker 17 | 5 South Brae safe, code 956 | 575 | Boltcutters and a Mechanical Part |
| North Brae – Locker 204 | 6 North Brae safe, code 736 | 971 | Mechanical Part |
| Upper Brae – Locker 94 | 5 Upper Brae safe, code 129 | 490 | Mechanical Part |
Chapter 9 — Begin Again: the road into Clara Woods
Where you are: a harbour pier. Goal: walk into Clara Woods. This chapter has no puzzles.
- Walk up the road of bodies to the split and take the left branch.
- Take the Clara Woods Estate map from the Clara Woods sign.
- Carry on along the left-hand street into the estate.
- Harbour Notice: on a railing to the left of the boat by the ramp. Turn left for it straight away, because walking to the right pushes you on to the next area.
- Strange Postcard 10: at the split, go right towards the dead end. Take the alley just past the body hanging from a lamp, go through two gates into the yard, and check the shelf in the shed.
- Store Staff Notice on the counter of the store down the left-hand street, and a radio broadcast at about 61 in the middle of the same store.
NEXT →Chapter 10 starts at a telephone booth on the estate's ground level.
Chapter 10, step 1 — Missing Parts: the lockers and 5 South Brae
Where you are: Clara Woods Estate, ground level. Goal: get the Flare Gun, the Boltcutters and the first Mechanical Part.
Every CEG locker code and what is inside
- CEG Employee Lockers building: read the two notes on the computer, Lost and Found and the CEG Employee Locker List. In the back office, open the LOST AND FOUND locker with 772 and take the South Brae House Key.
- Take Barcode (CEG Lockers) – Locker 75 from the counter opposite the computer. Scan it at the barcode scanner to get PIN 184, then open locker 75 for the Flare Gun.
- Go south to the entrance of the area, on the upper level, and open 5 South Brae with the South Brae House Key. Take the Disk Case Key from the drawer beside the bed, in the bedroom at the end of the upstairs hallway.
- In the room with the computer, open the container to the right of the safe with the Disk Case Key to get the Grouped Floppy Disks.
- Atlas Computers, ground level: open the container in the side room with the Disk Case Key to get the "Fix-A-Disk!" Software.
- Back at the 5 South Brae computer: turn it on and insert Fix-A-Disk! in the middle drive. When the screen reads "Insert a disk to scan.", back out without choosing Cancel and take the disk out. Insert Floppy Disk (2 of 3) and choose Repair Volume.
- Take that disk out, insert Floppy Disk (1 of 3), confirm Unzip to RAM, then insert (2 of 3) and (3 of 3). Turn on the printer to the left of the table and print MANUAL.EML.
- The printout, Reciprocating Compressor, gives part number 956. Enter it on the safe to the right of the computer and take Barcode (South Brae) – Locker 17.
- Scan it at the lockers building to get PIN 575. Locker 17 holds the Boltcutters and the first Mechanical Part.
NEXT →Head to the northeast corner, beside the lockers building, for 6 North Brae.
Chapter 10, step 2 — 6 North Brae: the painting safe
Where you are: by the lockers building with the Boltcutters. Goal: the North Brae barcode.
Lamenting Poem: the painting safe and every Clara Woods code
- Go up the stairs in the northeast corner and cut the gate at the top with the Boltcutters.
- Enter 6 North Brae by the back door. Read the Lamenting Poem on a chair in the second bedroom upstairs.
- The poem points to objects in the paintings around the house, and the counts give 736. Open the safe on the table with it and take Barcode (North Brae) – Locker 204.
NEXT →Go to CEG Staff Parking for the Overpass and 5 Upper Brae.
Chapter 10, step 3 — 5 Upper Brae: the tapes, then the Strange Gate
Where you are: CEG Staff Parking. Goal: the Upper Brae barcode, then the last two lockers. Inside 5 Upper Brae, the tape in the upstairs player sets which day the house is in, and different items appear on different days.
All 13 phone numbers, and why a call may not count
- At the top of the stairs in CEG Staff Parking, cut the gate to the Overpass with the Boltcutters and enter 5 Upper Brae.
- Upstairs, first room on the left: take The Code Today from the table. Play the tape in the player, then open the player and take Tape: Today.
- Take Tape: Yesterday from the black container in the bedroom at the end of the upstairs hallway, and play it. Downstairs, open the black box in the living room for Tape: Tomorrow, and pick up The Code Before from the kitchen table.
- Play Tape: Tomorrow. Pick up The Code After in the living room, and take Tape: Do Not Play from the black box in the kitchen.
- Play Tape: Do Not Play, then take the Back Door Key from the kitchen counter beside the door.
- Play Tape: Today. Go out the back door and down the alley to a door that is only open on this day, and take the Ammonite Disk from the table.
- Play Tape: Yesterday. Insert the Ammonite Disk in the reader left of the computer and read the Current Count file.
- Play Tape: Today again and open the safe on the table with 129. PowerPyx explains it as the number that falls between the numbers on the other two code notes. Take Barcode (Upper Brae) – Locker 94.
- Back at the scanner, locker 204 opens with 971 and locker 94 with 490. Each holds a Mechanical Part.
- Combine the three parts in your inventory, the two discs first and the cylindrical piece last, to make the Constructed Mechanical Device.
- Insert the device in the pipe structure at the Strange Gate, at the end of Atlas Way. Key To The Castle unlocks.
- Phone numbers: 946 (W H O Dial Back Service) on the poster in the starting booth, which then gives you 496 0112; and 496 0993 (CEG Lockers), printed on the barcode clues.
- Resource containers: a Lockbox Key in the Post Service cash register on Atlas Way opens the container in the apartment northeast of Atlas Square. A second key, on a washing machine in the laundromat behind the Post Service (cut the gate), opens the container in the lockers back office.
- Strange Postcards 11 to 14: in a dresser drawer in the upper-floor apartment; behind the breakable window opposite Atlas Computers; beside a metal cart at the Overpass dead end; and in the shed down the alley while Tape: Tomorrow is playing.
- Flare Gun and brick trophies: Pinpoint Inaccuracy (flare headshot from over 10 m) and Long-Range Masonry (brick headshot from over 15 m).
- CRTV broadcasts at about 62 (the Strange Gate), 67 (the building left of CEG Staff Parking), 59 (the 5 South Brae radio, and again after locker 17), 29 (leaving 5 Upper Brae) and 65 (after the third part).
NEXT →Chapter 11 starts inside CEG HQ.
Chapter 11 — Inside CEG HQ: Richard's box and the access card
Where you are: CEG HQ ground floor. Goal: print an access card that works the elevator. Take the ground-floor map from behind the reception desk.
Richard's box, the security room and every CEG Tower code
- Read Box IDs and Names on the podium, on the stage at the back of the lobby.
- Maintenance room, northwest corner: take the first Grid of Codes from the bin by the computer, and look at the whiteboard.
- Security room near the front entrance: enter 4895, which the whiteboard hints at. Take the second Grid of Codes from the bin and combine the two in your inventory.
- Go to box 36 in the seating: from the podium, third row up, seventh box along. Enter 486 and take the Employee File Cover Note from Richard's box.
- At the Employee Database computer, enter Employee ID 00007820518, switch on the printer to the left and print an access card.
- Take the Printed Access Card from the printer and use it on the elevator.
- Inquiry Preparation Notice next to the map, two emails on the security-room computer, and a radio broadcast at about 61 to the right of the security phone.
PowerPyx's speedrun route goes straight from the security door to the database computer, but its answer cites "the file in the box", and its 100% guide lists box 36 as a puzzle. Because the game can refuse an answer until its clue has been picked up, treat the box as required. Neither guide explains how the grid produces 486.
NEXT →Part 5 switches to Richard, outside the same tower.
Part 5: Richard — Chapters 12 and 13
Richard is given the Shotgun early, and the enemies in his tower are Widows. Most of Chapter 13 is a loop between the Boardroom on the 5th floor and the offices below it.
Widows: how to deal with the enemies in this part
Chapter 12 — Richard: Getting Inside: the generator
Where you are: CEG HQ exterior. Goal: start the generator so the elevator can take you inside.
Generator puzzle: the key and the three levers
- Go left of the front entrance into the small security booth and press the button to open the gate.
- Enter the second building on the left of the parking lot by its garage door, go upstairs and left into the Manager's Office, and take the Generator Key from the cabinet behind the door.
- At the back of the generator, turn the right lever so it sits diagonally and leave the left and middle levers vertical (off).
- At the front panel, place the key on the right, then pull the red lever on the left. With the generator running, take the elevator into the building.
- Construction Halted Notice, CEG Kiosk Note and CEG Memo. Once the power is on, read the two emails on the computer in the first building. A locker at the other end of that room opens with 147.
NEXT →Chapter 13 starts on the 2nd floor, where the Shotgun is added automatically.
Chapter 13 — Richard: Another Attempt: the Boardroom projector
Where you are: CEG HQ, 2nd floor. Goal: repair and load the Boardroom projector on the 5th floor. Take the Mezzanine – Fifth Floor map from beside a body on the stairs between the 2nd and 3rd floors.
Projector puzzle: parts, Finance door and slide order
- Go up to the Boardroom on the 5th floor. After the cutscene, take Access Card – Level 3/4 from the table.
- 3rd floor: use the card on the door to the west side (Finance and Public Relations), then on the Public Relations door in the southwest corner.
- Take the stairs in Public Relations up to the Media Department on the 4th floor. Pick up the CEG Storeroom Key from beside a body in the west room, open the storeroom on the far side, and take the Projector Bulb and the CEG Checkout Sheet from the GENERAL STORAGE cabinet.
- Back on the 3rd floor, scan the Access Card at the Finance door, then enter 2709 from the checkout sheet. Take the Projector Lens from a desk drawer in the CFO room.
- Boardroom: fit the Projector Bulb, then the Projector Lens, in the front of the projector and press the red switch on its left side. Take the CEG Maintenance Key from the hand of a body at the table.
- Open the 5th-floor Maintenance room with the key. This unlocks the Maintenance door on every floor. Take the Projector Slides from the table in the Mezzanine Meeting Room.
- Boardroom: hold L1/LB to view the slides and load them in the order of the agenda the projector displays (table below), then press the red Play button on top.
- After the cutscene you receive the CEO Access Card and Find Yourself unlocks. Use the card on the elevator to reach the 10th floor.
| Agenda item | Slide |
|---|---|
| 1. Recent Headlines | D — triangle, newspaper |
| 2. External Demonstrations | F — hexagon, protest signs |
| 3. Company Hierarchy | B — star, hierarchy chart |
| 4. Financial Projects | C — diamond, profits chart |
| 5. Public Inquiry | E — plus, courtroom sketch |
| 6. Counter Arguments | A — square, censored photograph |
- Richard's Note, on the ground beside a body in the southeast room of Public Relations, has three storeroom codes: 1607 (Public Relations Records, 3rd floor), 1306 (Operations Storage, 2nd floor) and 4512 (Administration Storage, 1st floor). All three rooms hold only supplies.
- Human Resources on the 4th floor opens with the Level 3/4 card.
- CEG Tower Meeting Minutes in the east meeting room on the 3rd floor, two emails and the PR Meeting Note in Public Relations, and one email on the 10th-floor computer.
- Missing The Point Entirely needs 30 Widows silenced. PowerPyx found fewer than that in one Story Mode run, so plan to finish it on New Game Plus. Kills as Richard do not affect your ending.
NEXT →Part 6 returns to Simon on the 10th floor.
Part 6: Simon — Chapters 14 to 17
The last part passes through two Otherworld industrial sites and ends with the final boss. Each large control panel is solved from a paper or a camera feed in the same area, so read everything near a panel before you start pressing buttons.
Chapter 14 — Fix This: the alarm panel and the gas pipe
Where you are: CEG HQ (Different), 10th floor. Goal: line up the gas pipe through the central tower and ignite it.
CEG gas pipe puzzle: alarm codes and crank turns
- As you enter the main room of the new area, take the Reference Sheet from the desk on the right.
- Take the elevator to the second floor and take the Controller Key from the box on the console left of the red clamp wheel.
- Ground level, alarm panel beside the red clamp wheel: unlock the buttons with the Controller Key, enter A5D7 (the Alarm Code on the Reference Sheet) and press OK.
- On the right-hand panel, enter E3E3 (from the top of the Reference Sheet) and press OK.
- Use the crank on each floor to rotate the middle tower until the red pipe runs unbroken to the top. Floor 1: two turns either way; the pipe runs up, then right. Floor 2: one turn left; the pipe rises on the left and joins on the elevator side. Floor 3: two turns either way; it joins on the left and runs straight across in front of you. Floor 4: two turns either way; it now joins the top in front of you.
- Back at ground level, on the right-hand panel press Gas Flow, then Flow Test (every light should turn green), then IGNITE.
- Ordell File on the 10th-floor desk, and the email on the computer outside the office.
- Radio broadcasts at about 42: one beside the Reference Sheet, and one in the pipe room to the left, before the ladder.
- Strange Postcard 15: through the vent door after a short ladder, go right and then left at the four-way split. It is on the ground in the dead end.
NEXT →Chapter 15 continues in SWDP – Different.
Chapter 15 — Trying Again: the SWDP control room
Where you are: SWDP – Different; the map is added as you arrive. Goal: work the remote control panel, reroute the auxiliary lines, then release the clamp. Each panel command is three presses: an action switch, a system switch and a three-digit number, then ENTER at the bottom right.
Open Valve B: the control-room panel, every command and where each number comes from
AUX puzzle: every auxiliary-line switch position
New Game Plus and the two endings it unlocks
- Take the JOE Key from a table in the corner of the room with the computer, then open the door marked JOE in the southwest corner.
- Squeeze through the gap in the wall and take the Access Card from the counter beside the bed.
- Back in the main area, go to the upper floor and open the door on the east side with the Access Card. PowerPyx's 100% guide lists a Remote Systems Control clue to the right of the panel; take it too.
- At the panel with the printer above it, flip both switches to turn it on.
- Command 1: open (top-left corner) + valve (circle with a red line through it) + 245, the number on VALVE B in the camera. Command 2: start (green arrow, first column) + filter (middle button, right column) + 130, from the filter-unit camera.
- Open the locker to the right with 0825, the code the panel gives you, and take the AUX Key.
- Take the elevator back down and open the AUX room in the northwest corner of that floor. Take the AUX Disk from the top-left shelf of the cabinet, insert it on the left of the computer and read the Auxiliary Lines file.
- Set the wall switches to match Auxiliary Lines. Lines 1 and 2 start from the wall facing away from the computer. Count the painted lines beside each switch to know which line it belongs to, and point it the way the arrow goes. A line's light turns green once it is right.
- Back at the control-room panel. Command 3: flush (second row, second column) + auxiliary (one up from the bottom right) + 246, from the paper to the right. Command 4: stop (red square) + regulator (green and red dial) + 781, from the Regulator Systems camera. Command 5: unlock (open padlock) + door (the door icon in the top row) + 592, from the Valves D–F camera.
- Turn Valve F, then go back up to the control room and take the Clamp Release Procedure from the printer on the left.
- On the panel opposite, set every control as in the table below. The order does not matter. When the green RELEASE button flashes, press it.
- Go down and turn the red crank. Can't Change Things unlocks.
| Control | Setting |
|---|---|
| BALANCE (both) | Intermediate |
| NOTIFY (both) | On |
| RUN OFF | Disengaged |
| Clamp Connection pad | D71 (the number in front of you) |
| REPORT switches | 1st, 3rd and 6th on (yellow light) |
| PRESSURE CONTROL | SET (bottom) |
| INTUBATE FLOW | NONE (bottom) |
| BATTERY ONE / BATTERY TWO | B (up) / C (right) |
- Lockbox Keys: one on a counter in the west room at the top of the south stairs, for the container right of the control panel; one on the counter of the northwest room on the lower floor, for the container in the long valve room. Resourceful needs every container.
- Extra doors below open from the same panel with unlock + door and 621, 047 or 793.
- SWDP: Ordell Site Visit email, RCU Refit Note and Photo of Joe McKenzie, plus a radio broadcast at about 55 by the bed.
- New Game Plus only: door 793 holds the Gold Coin for the Dog ending, and the Sci-fi ending triggers from a keypad at the end of this chapter and skips the final boss.
NEXT →Chapter 16 is the final boss fight in Clara Woods (Different).
Chapter 16 — Eraser: the final boss
Where you are: Clara Woods (Different). Goal: defeat The Weight, the final boss, which awards Eraser.
PowerPyx's endings guide gives the damage loop: stun the boss with the Flare Gun, run in and fire the Shotgun twice, then back off and keep circling the arena, picking up more flare ammunition as you go. AllThingsHow adds that the fight has three phases, that it kneels at the end of each one so you can pull out one of its metal bars, and that it gains a ranged whip in the last phase. Neither guide names the difficulty it was played on.
The same guide says a flare also stuns the large enemy you cannot kill in the final section, which lets you run past it. Any enemies you kill in the boss arena count as Kills when the game picks your ending.
How to beat The Weight: the final fight step by step, and how to survive its stalking sections
NEXT →The epilogue follows the fight.
Chapter 17 — Returning: the epilogue
Where you are: St. Amelia Shorefront. There is nothing to solve. Walk down the beach to Richard at the end of the pier, where the ending your run earned plays out.
All five endings and how each is decided
- Crew Patch: walk past the stairs on the beach instead of climbing them. It is on a pair of overalls.
Code quick reference: every lock and answer
The answers from the chapters above, gathered in one place. When a correct entry is refused, the last column of each table shows what to pick up or do first.
Puzzle solutions: answers with links to each detailed guide
Opening checklist: every item and clue you must pick up
Part 1 only. For Parts 2 to 6, the code table below lists the clue behind each answer.
| Item | Type | Where | Used for |
|---|---|---|---|
| Shorefront Map | Map | Automatic on reaching the town square | The numbered locations used on this page |
| Phone numbers 900 / 010 / 100 | Phone numbers | Flyer beside the first phone, Town Square (5) | Saving from any phone (100) |
| CRTV | Equipment | Automatic in A Different Place | Channel 60 date clue; the Pharmacy broadcast (Channel 30) |
| Room Service Card | Clue | Table in A Different Place | Door wheel (the year) |
| Room 204 Key | Key item | Bathroom counter behind the wheel door | Hotel room door; last door of Chapter 8 |
| Flashlight (No Batteries) | Key item | Zoe's house, drawer left of the organ box | Combined into the Flashlight |
| AA Batteries | Key item | Zoe's house, cabinet drawer in an upstairs room on the left | Combined into the Flashlight |
| Organ Transplant Card | Clue | Zoe's house, upstairs bathroom floor | Organ box code (the digits) |
| Power Card Credit Guide | Clue | Zoe's crawlspace (needs the Flashlight) | Power panel |
| Prepaid Power Card | Key item | Peters Newsagent (2), cash register | Power panel |
| Email "For Attending…" | Clue | Zoe's computer, after the power is back | Organ box code (which digits to use) |
| Zoe's Lanyard | Key item | Organ transport box | Clinic door; Clinic scales |
| Scalpel | Equipment | Clinic (6), Z Ellis office, green box | Rusty doors with a hatch |
| Prescription Dosage Error | Key item | Pharmacy (7), rusty locker | Clinic scales |
| 21 Farrow St. – Back Door Key | Key item | Apartment 1/2, building south of (14) | Jess's back door |
| Broken Stethoscope | Key item | Jess's house, bed in the bedroom | Clinic scales |
Every lock in the opening, and what it needs first
If a correct answer is refused, check the last column first: a missing item or clue there is the most likely reason.
| Lock | How it opens | You must already have |
|---|---|---|
| Door wheel, A Different Place | 18 / January / 1996 | Room Service Card; CRTV Channel 60 |
| Hotel room door | Room 204 Key | Wheel door opened |
| Power panel, Zoe's crawlspace | Card in bottom slot → A to "Card Credit" → B → main switch | Flashlight; Power Card Credit Guide; Prepaid Power Card |
| Organ transport box | 956 left, 133 right | Organ Transplant Card; email "For Attending…" (needs power) |
| Clinic front door (6) | Zoe's Lanyard on the pad | Organ box opened |
| Clinic reception door (optional) | 2896 | Post-it note on the Z Ellis computer |
| Pharmacy door (7) | Scalpel | Scalpel from the Clinic |
| Pharmacy rusty locker | 6539 | Pharmacy posters; the CRTV broadcast that orders them |
| St. Amelia Park south door (11) | Scalpel | Scalpel |
| Jess's back door | 21 Farrow St. – Back Door Key | Key from apartment 1/2 |
| Clinic scales | Stethoscope left, Dosage Error middle, Lanyard right | All three items |
Every code and answer from Part 2 to the end
Required steps only, in story order. Optional storeroom and locker codes are listed under their chapters above.
| Ch. | Lock or puzzle | Answer | Clue you need first |
|---|---|---|---|
| 5 | Community Gardens shed | 1993 | Jane Chalmers flower bed |
| 5 | Dr. Glenn phone line | 496 0556, then 3 · 2 · 2 · 1 | Medical Security Note on the security booth |
| 7 | Monitor readings | 70 / 40, Pulse 160, SpO2 80 | Monitors; laptop left of the bed |
| 7 | Surgery door | 7103 | Number sent to the pager |
| 7 | X-ray, skull | Skull · kV 3 · mA 7 · Time 1 | X-Ray Dosage Table on the laptop |
| 7 | X-ray, chest | Chest · kV 7 · mA 3 · Time 1.2 | X-Ray Dosage Table on the laptop |
| 7 | Records Room | 2605 | Dailies – Records Room Code |
| 7 | Infusion pumps | Dextracyclate 15 · Hydroxalene 7 · Tensobromide 8 | Medication Dosage Table; 88 kg on the whiteboard |
| 7 | Hospital Storage | Dial 5353 on the reception phone | Given by Dr. Glenn |
| 7 | Intubation | Right side → lower left → top | Medical Intubation Kit |
| 8 | Surgery door (Different) | 7103 | — |
| 8 | Blood bag wall | Left 1 Sarah Watson · Left 2 Matthew Clark · Right George McEwan | Zoe's Patient List; all three bags |
| 8 | Blood-type rings | Connect T.F., H.M. and S.W., then press ORDELL | Medical Wristband (Equipment) |
| 8 | Last door | Room 204 Key | Key from Chapter 2 |
| 10 | Lost and Found locker | 772 | Note on the lockers computer |
| 10 | Locker 75 | 184 | Barcode (CEG Lockers) |
| 10 | 5 South Brae safe | 956 | Reciprocating Compressor printout |
| 10 | Locker 17 | 575 | Barcode (South Brae) |
| 10 | 6 North Brae safe | 736 | Lamenting Poem; the paintings |
| 10 | 5 Upper Brae safe | 129 | Current Count (Ammonite Disk) |
| 10 | Locker 204 | 971 | Barcode (North Brae) |
| 10 | Locker 94 | 490 | Barcode (Upper Brae) |
| 10 | Strange Gate | Constructed Mechanical Device | Three Mechanical Parts |
| 11 | Security room | 4895 | Maintenance whiteboard |
| 11 | Box 36 | 486 | Box IDs and Names; both Grid of Codes halves |
| 11 | Employee Database | 00007820518 | Employee File Cover Note |
| 12 | Generator | Right lever diagonal, left and middle vertical; key on the right; red lever | Generator Key |
| 13 | Finance door | Access Card, then 2709 | CEG Checkout Sheet |
| 13 | Projector slides | D · F · B · C · E · A | Projector Slides; the agenda on screen |
| 14 | Alarm panel | A5D7, then E3E3 on the right panel | Reference Sheet; Controller Key |
| 14 | Tower cranks, floors 1–4 | Two turns · one turn left · two turns · two turns | — |
| 15 | Remote panel, first visit | 245, then 130 | Valve B and filter-unit cameras |
| 15 | AUX locker | 0825 | Given by the panel |
| 15 | Auxiliary switches | Match the diagram | Auxiliary Lines (AUX Disk) |
| 15 | Remote panel, second visit | 246, then 781, then 592 | Paper beside the panel; two cameras |
| 15 | Clamp release | Chapter 15 table; pad D71 | Clamp Release Procedure |
The loop every chapter repeats
Townfall is not a push-forward combat game. The rhythm reported from hands-on sessions is explore, tune for a lead, slip past or remove the threat, then solve something to open the road.
In a new area, tune first, then look, then move. A CRTV sweep shows where the patrols are before you commit to a door.
Pick your exit before your objective. Closets, sheds and half-open doors work as cover, and you can lean out to check a patrol before moving.
Only then search. Documents carry puzzle codes and count as Discoveries for the ending, and the story does not let you return to earlier areas.
Expect this loop to be slow early. One journalist spent three hours and completed a single objective: fetching a prepaid power card from a corner shop to restore power.
An imagined editorial scene, not an in-game route, inventory or location.
Silent Hill Townfall Wiki · AI-generated original illustration · Material statementCombat during the route
Improvised melee weapons break. A plank lasts a handful of encounters and then it is gone, so treat every swing as spending a resource.
Weapons arrive at fixed points in the story: the Pipe in Chapter 8, the Flare Gun from locker 75 in Chapter 10, and the Shotgun when Richard reaches the 2nd floor in Chapter 13.
The pistol comes in Chapter 6, from a box in Town Square (5). You have to take it: choosing "Yes" triggers the Otherworld shift that lets the story move on. The PlayStation.Blog report is blunt that firing a gun "always makes things worse", because the noise pulls more enemies toward you.
On normal difficulty, two or three hits kill you, and enemies have grab attacks that punish hesitation. Walking away is usually the correct play.
Broken melee weapons do not come back and ammunition stays scarce. Save Flare Gun ammunition for the final section, where a flare is what gets you past the large enemy and opens up the boss.
Every weapon in Townfall and when each is worth using
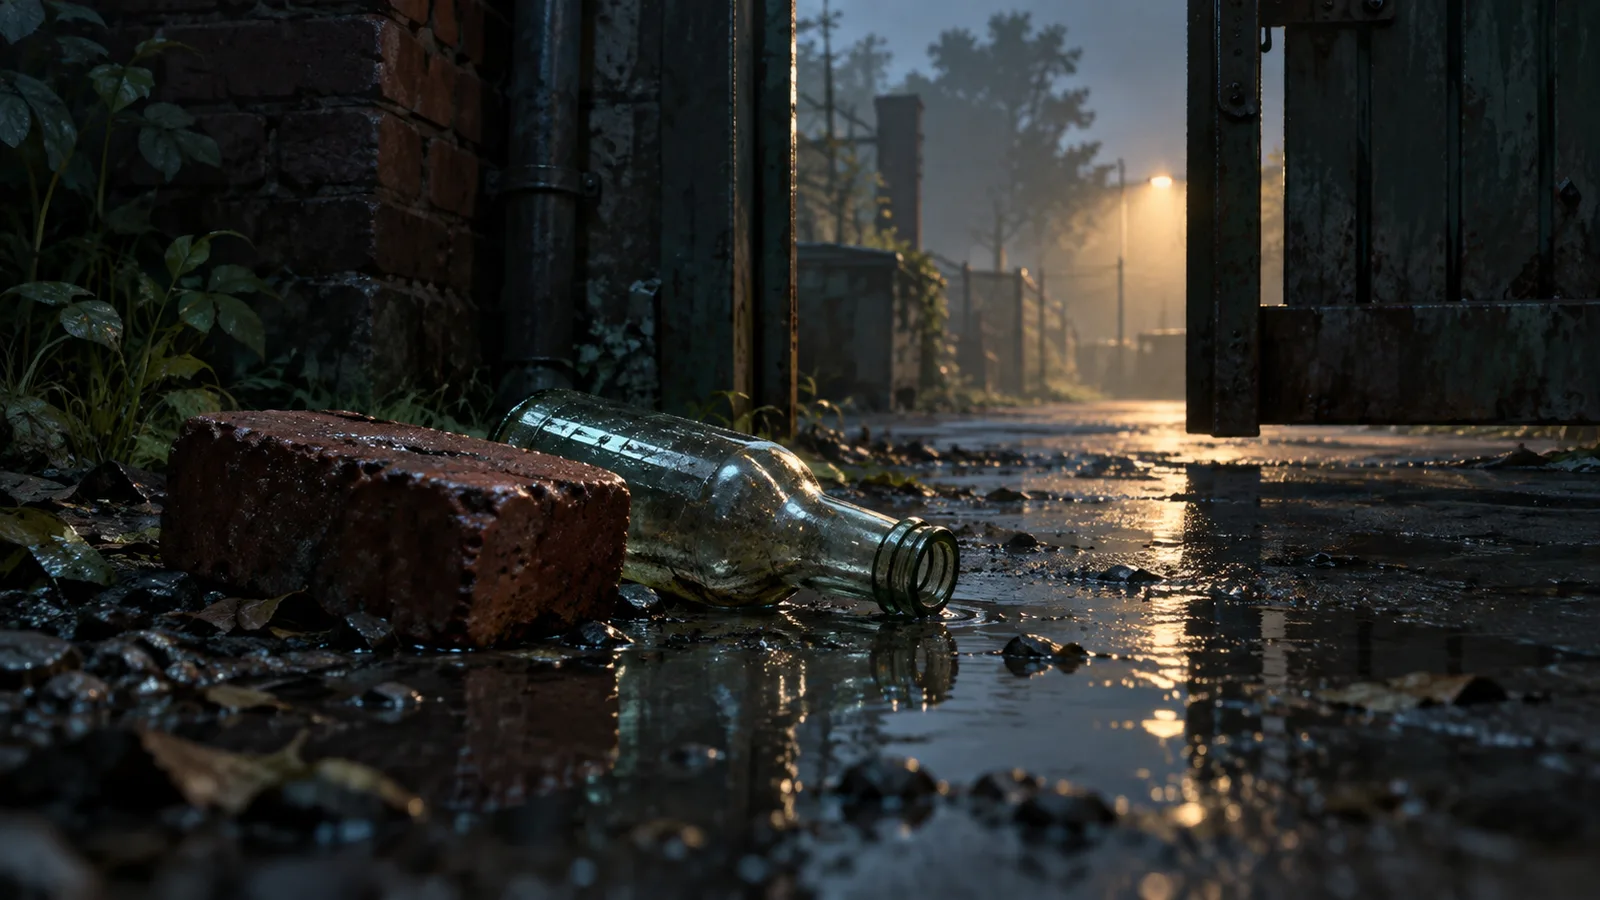
An imagined editorial scene, not an in-game route, inventory or location.
Silent Hill Townfall Wiki · AI-generated original illustration · Material statementNamed locations you will pass through
The structure is a single-track route that alternates between the real town and its Otherworld counterparts. Earlier areas close behind you.
- Shorefront District – South: the town square, Zoe's house, Peters Newsagent, the Clinic, the Pharmacy and Jess's house
- A Different Place: the Otherworld hotel room where you get the CRTV
- Shorefront District – North: Mr. Stewart's house and the Medical Centre gates
- St. Amelia Medical Center, then Medical Center – Different for the transfusion
- Clara Woods Estate, ground and upper levels
- CEG HQ: the lobby, floors 1 to 5 and the 10th-floor office
- CEG HQ (Different) and SWDP – Different, the last two industrial areas
- Clara Woods (Different) for the final boss, then St. Amelia Shorefront
Platform notes worth knowing before you start
On PS5 Pro the game supports PSSR and ray tracing. The DualSense uses its gyro for both CRTV tuning and aiming, which is the intended way to hunt for a signal. If radio tuning with the motion sensor is a struggle, PowerPyx points to the "Enable CRTV Motion Sensor controls" option in the PS5 control settings, which lets you turn it off.
You save from any phone by dialling 100, the number on the flyer at the first booth. Autosaves announce themselves with the red square the series has used for years.
What this walkthrough does not cover yet
Collectible trophies and what each one tracks
Updated September 23, 2026. The main route now covers all six Parts, from the red fog to the epilogue. It follows the full-game guides PowerPyx recorded, mainly on Story Mode, and GamesRadar+ confirms the organ box and door wheel. We have not played the route ourselves. The final boss fight is covered step by step on The Weight page. Not yet covered: differences on the Normal and Nightmare combat settings, route changes on New Game Plus, and a full list of collectibles for every chapter. The optional lists here are the main pickups, not a complete checklist. We have not confirmed whether any code is randomised per save. If one does not work, fetch the clue it comes from before trying anything else.
Where the route gets harder
The transition into the Otherworld Medical Center in Chapter 8 is the point where the game stops being a town exploration and becomes something else. The blood-bag hunt there is the first long stretch with a large enemy you are meant to avoid.
Clara Woods in Chapter 10 is the longest puzzle chain: four barcodes, three safes and a house that changes day with a tape. From CEG HQ onward you are in the back half, and SWDP – Different comes immediately before the final boss.
Playing for an ending while you walk the route
Townfall has five endings, and none of them is selected by a menu. The director has said the outcome tracks how you played: your aggression, your thoroughness and the time you spent in each area.
PowerPyx's endings guide gives the exact rule for the three main endings: a hidden score. Each Discovery (a clue or document you pick up) is +1, each enemy killed as Simon −2, each cannula refill −4 and each mistake in Zoe's Chapter 7 surgery −3. A final score of 20 or more gives Justice, 0 to 19 Forever, and below 0 Abandoned. Kills as Zoe or Richard do not count, and time played and healing items make no difference.
So the optional documents listed under each chapter matter for your ending, not just for trophies. Three endings are reachable on a first run. Dog and Sci-fi need New Game Plus and come from specific items, so there is no reason to agonise over them on your first pass.
Silent Hill Townfall FAQ
Is there a full chapter-by-chapter Townfall walkthrough yet?
- Yes. This page covers all six Parts and 17 chapters in order, with every required item, code and puzzle answer, following the full-game route PowerPyx published. Optional collectibles are listed separately under each chapter.
Why does a puzzle refuse the right code?
- Usually because a prerequisite is missing. Some Townfall puzzles will not complete until you have picked up the clue behind the answer or finished an earlier interaction, even when the answer itself is correct. Fetch the document, card or CRTV broadcast the code comes from, or finish the step before it, then enter it again.
What opens the rusty doors in the town?
- The Scalpel, from Zoe's office in the Clinic. It opens any rusty door with a hatch in the middle.
Can I go back to an earlier area?
- No. Once the story moves you on, earlier areas are closed, so optional pickups are missable until you reload a save or start New Game Plus. Progress towards the collectible trophies carries over between playthroughs.
Do I have to fight my way through the story?
- No. Avoidance is the intended approach: melee weapons break, ammunition is scarce, and firing a gun draws more enemies toward you. Simon's kills also lower the hidden score that picks your main ending: each document is +1 and each Simon kill −2, and 20 or more gives Justice, 0 to 19 Forever, below 0 Abandoned. Kills as Zoe or Richard do not count.
Where do I save during the walkthrough?
- At any phone, by dialling 100 (Save Yourself) from the flyer beside the first phone booth in the town square. Autosaves also fire on their own and are flagged with the series' red square.
How long is the main story?
- About 10 to 14 hours, depending on how thoroughly you explore and how often you choose to fight.
Sources
- PowerPyx — Townfall speedrun walkthrough (all puzzle solutions)
- PowerPyx — Townfall collectible guide, 100% walkthrough (Parts 1–6)
- PowerPyx — Part 1: Arrival collectible locations
- PowerPyx — Part 2: Zoe collectible locations
- PowerPyx — Part 3: The Patient collectible locations
- PowerPyx — Part 4: Clara Woods collectible locations
- PowerPyx — Part 5: Richard collectible locations
- PowerPyx — Part 6: Simon collectible locations
- PowerPyx — Townfall all endings guide
- GamesRadar+ — how to open the organ box in Townfall
- GamesRadar+ — how to open the Townfall door dial mechanism
- AllThingsHow — Part 6 Simon walkthrough and final boss
- PlayStation.Blog — Townfall hands-on report
- PowerPyx — Townfall trophy list
- Silent Hill Memories — trophies and achievements
- PlayStation Store — SILENT HILL: Townfall
- Steam — SILENT HILL: Townfall store page
- 18 Minutes of Silent Hill: Townfall Gameplay
- Townfall Extended Gameplay Demo — TGS 2026
- Vice — story length and five endings